Tutorials

Note
All tutorials are based on Python and use the same program structure and common libraries (pyaudio over ALSA).
Note
More examples of NLP and DeepStream will be released on a regular basis.
Hardware Setup
Attaching a speaker to Apollo
Initializing the onboard microphones and speaker
Command line instructions for using microphones and speaker
While you can use Apollo without any other peripherals, if you want to output sound, you can connect an external speaker to the engineering kit. The inbuilt amplifier can accommodate a variety of speakers. However, we recommend using a 1 Watt, 4 Ohm speaker like the one shown below.
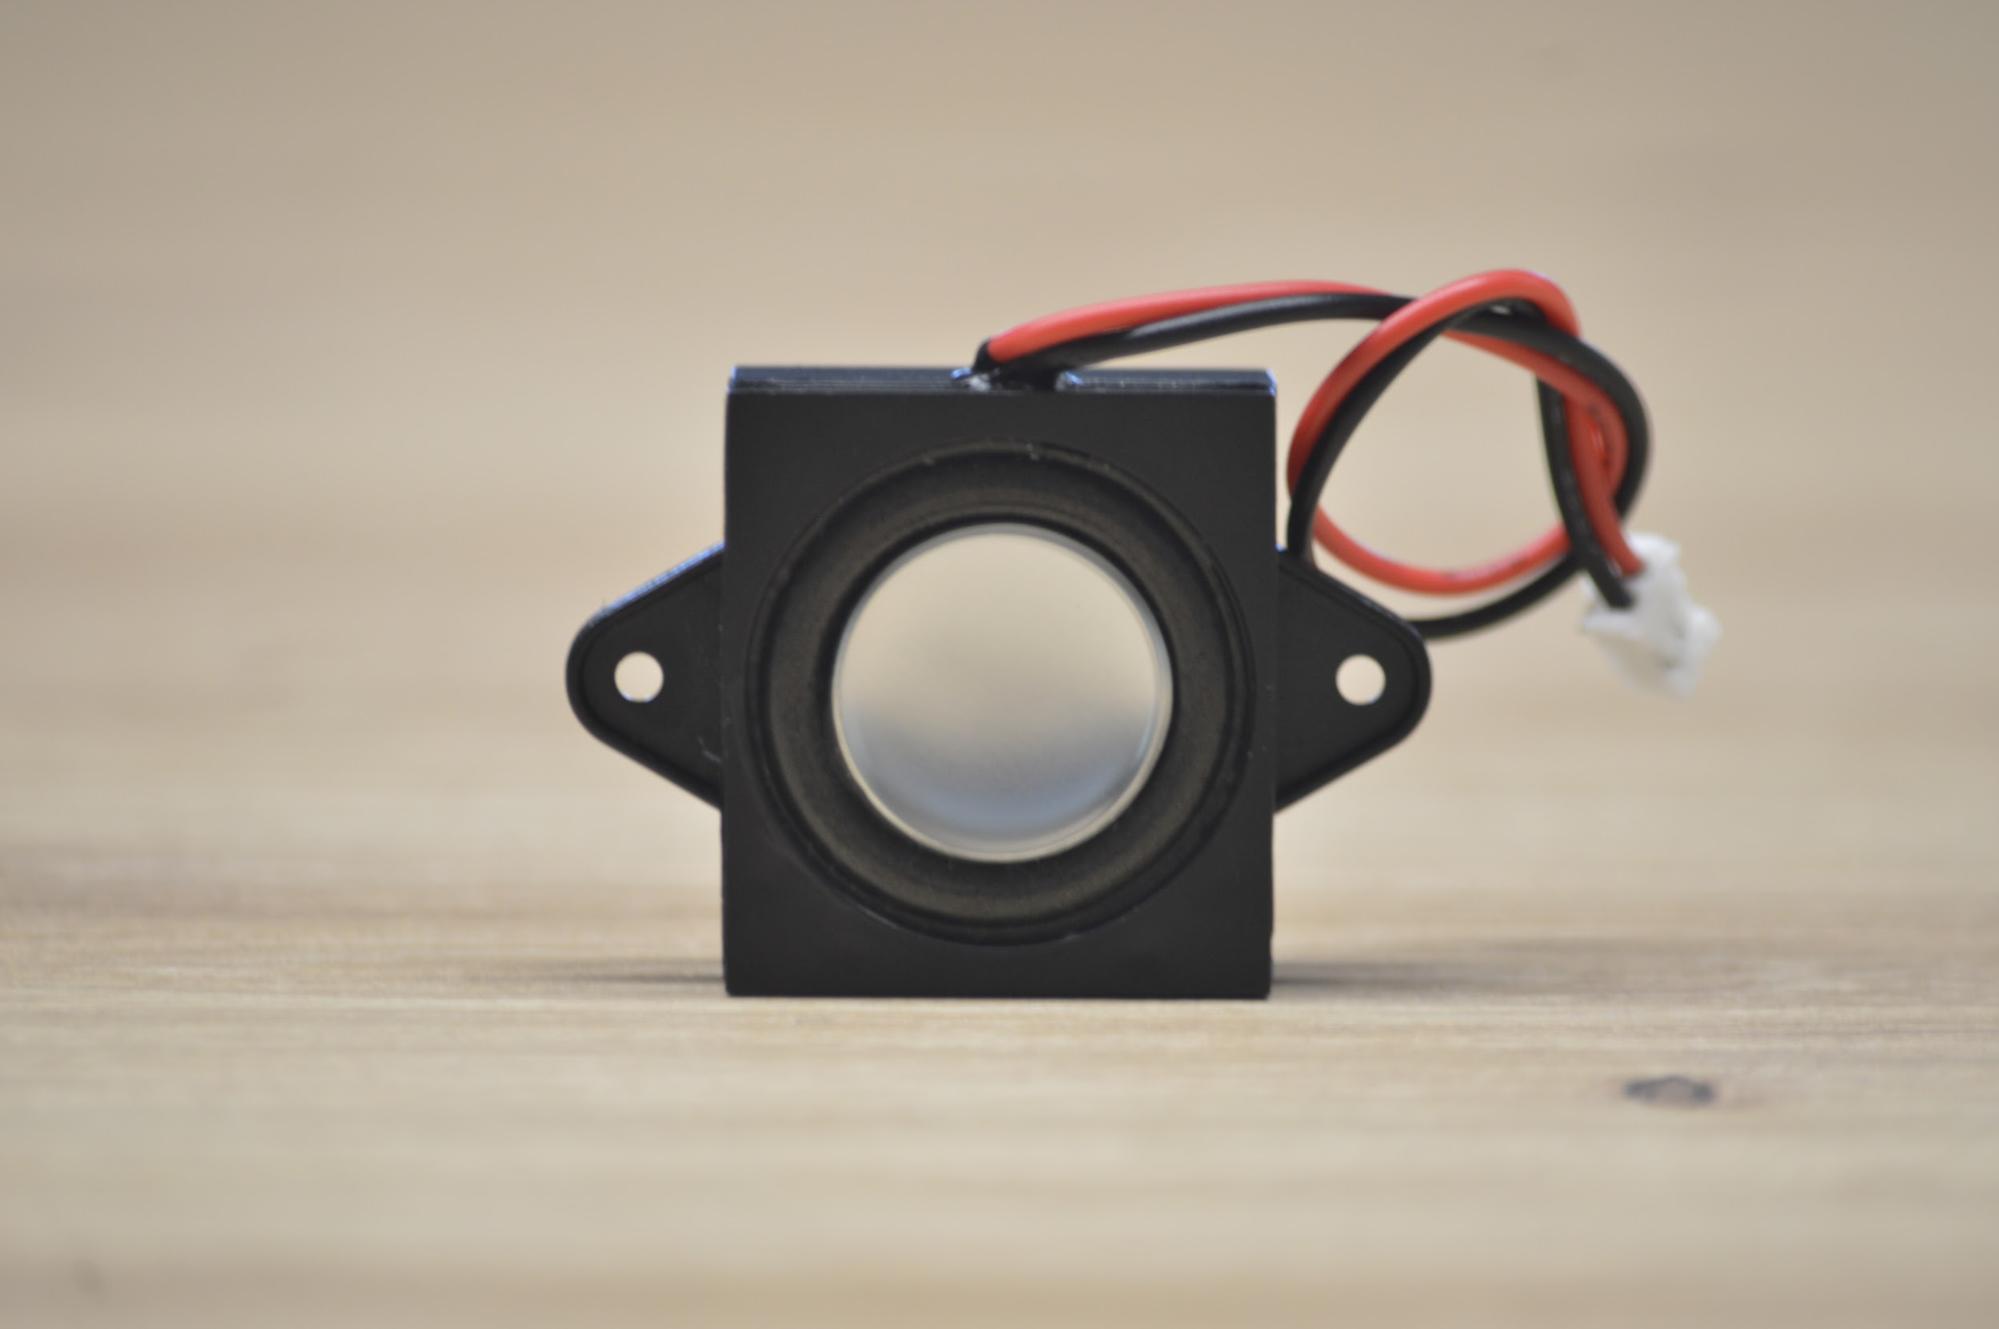
To attach the speaker, simply insert its connector into Apollo as shown below.
Before you proceed, ensure that the speaker's red wire is facing the near edge of Apollo. Reversing the polarity of the speaker may cause damage to the speaker. To test the speaker, use the following commands to play one of the included .wav files and output it to the speaker. Alternatively, you can record your own voice using the inbuilt microphones and play it back through the speaker.
Getting Started with Apollo RIVA Installation
Follow these steps to install NVIDIA RIVA
RIVA takes approximately 3.5GB to download and install without any active services runnin
Create a new NVIDIA account or sign in to an existing account. https://ngc.nvidia.com/signin
Generate an NGC API key.
Sign in to your NVIDIA account.
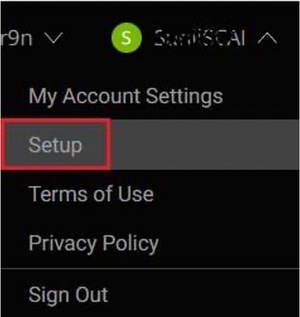
On the top-right corner of the page, click display_name>Setup.
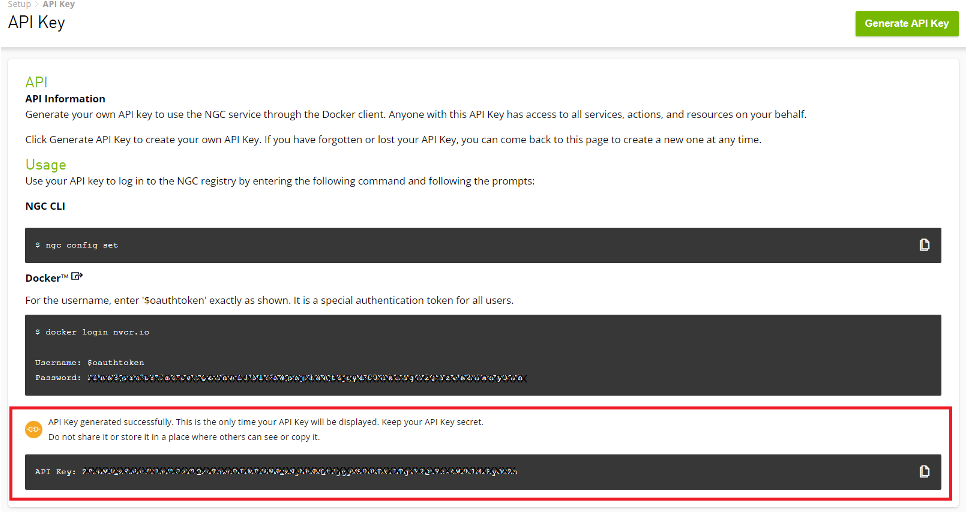
Click Get API Key, and carefully read the on-screen instructions.
Click Generate API Key.
Click Confirm.
After the API key is successfully generated, the key is displayed on the API Key page.
Important: This is the only time your API Key is displayed. Keep your API Key secret. Do not share it or store it in a place where others can see or copy it. If you lose the API key, you can generate it again; however, the old API key becomes invalid.
Download and install the NVIDIA GPU Cloud (NGC) CLI based on your operating system. https://ngc.nvidia.com/setup/installers/cli
To download and install NGC CLI on Apollo, follow the instructions on the AMD64 Linux tab.
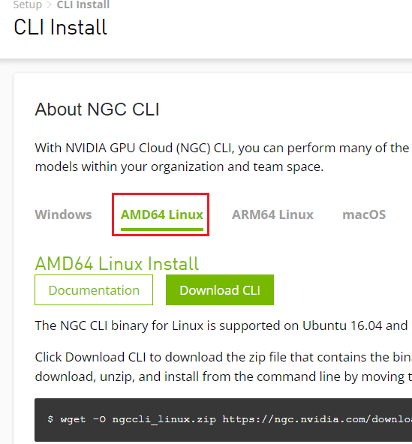
At the Linux command line, run the following commands.
Download, unzip, and install from the command line by moving to a directory where you have execute permissions and then running the following command.
wget -O ngccli_arm64.zip
https://ngc.nvidia.com/downloads/ngccli_arm64.zip
&& unzip -o ngccli_arm64.zip
&& chmod u+x ngc
Check the binary's md5 hash to ensure the file was not corrupted during download.
md5sum -c ngc.md5
Add your current directory to path.
echo "export PATH=\"\$PATH:$(pwd)\"" >>
~/.bash_profile && source ~/.bash_profile
Type the following command, including your API key when prompted.
ngc config set
After providing the API key, the system prompts you to specify the details listed in the following table.
Enter CLI output format type
Type the string listed under Choices.
To download RIVA for an ARM64-based systems like Apollo, run the following commands at the Linux command line.
ngc registry resource download-version nvidia/riva/riva_quickstart_arm64:2.0.0
cd riva_quickstart_arm64_v2.0.0
bash riva_init.sh
bash riva_start.sh
At the Docker container CLI, perform the following configuration steps.
jupyter notebook --generate-config
jupyter notebook password
Note: You can specify any password you want.
Launch the jupyter notebook session for asr-python-basics, asr-python-boosting, and tts-python-basics by running the following command.
jupyter notebook --allow-root --notebook-dir=/work/notebooks
You are prompted to launch your web browser using a link in the terminal and also prompted to type the password you previously used.
You should now have access to the notebooks.
Getting Started with Apollo: Audio
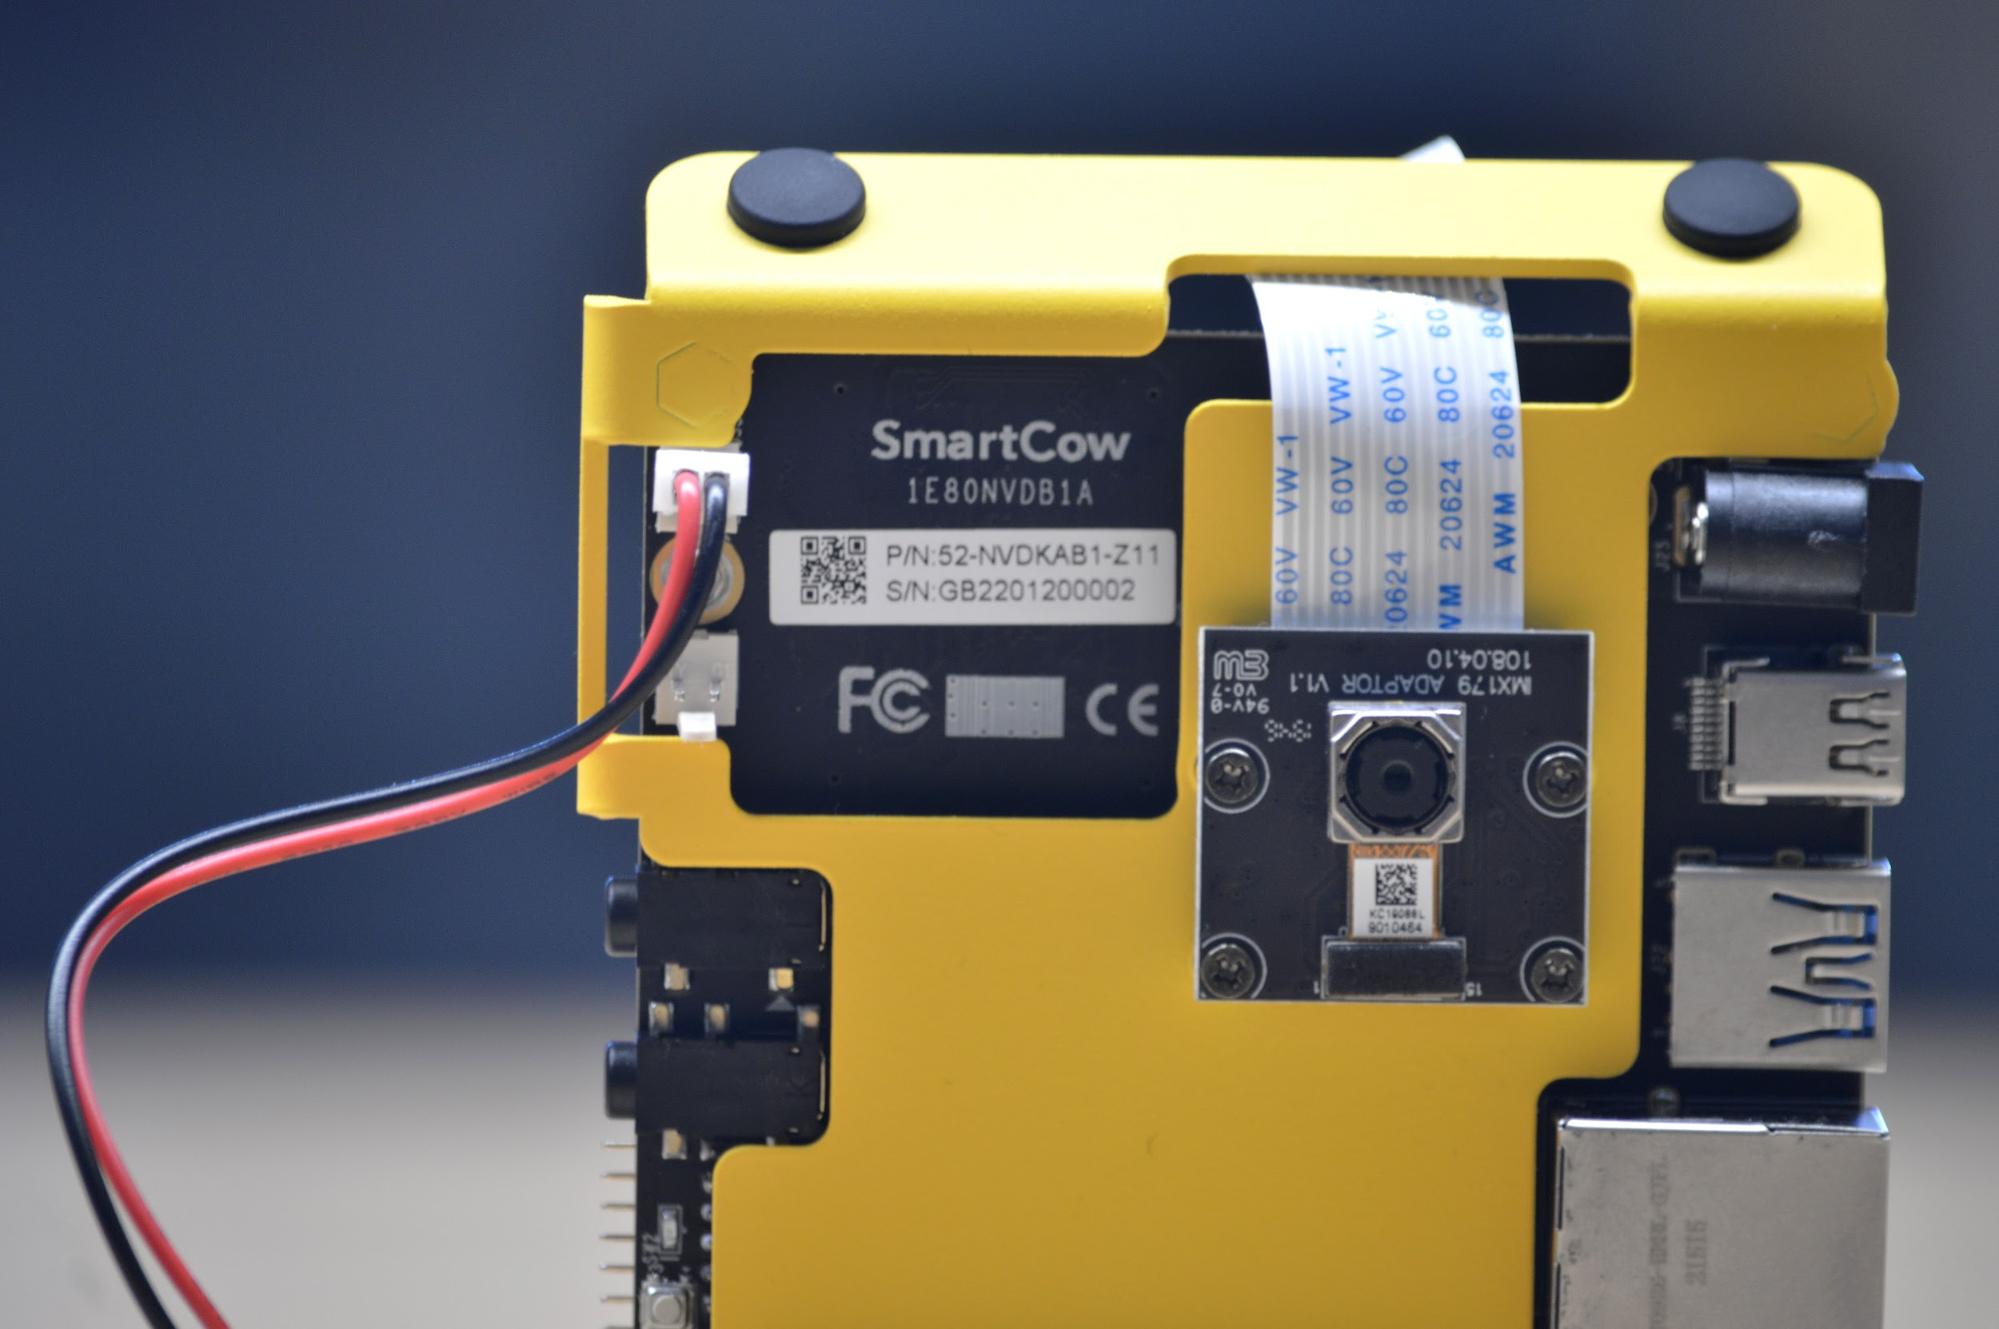
Working with Apollo can simplify and streamline your processes. However, you must make sure that Apollo is correctly configured. Ensure that you initialize Apollo's microphones and speakers. Apollo uses the I2S interface to communicate with these devices. The I2S connected to the microphone is always active, however you must initialize the I2S connected to the speaker at least once during the lifetime of the device.
sudo /opt/nvidia/jetson-io/jetson-io.py
If you have enabled the I2S function correctly the device prompts you to reboot. For more information, refer to the following article that walks you through the process step by step:
A Jetson Device For All Your Audio Applications
After rebooting, configure the sound card to access the microphone and speaker on the appropriate circuitry, and you're good to go! To complete these tasks, visit our Apollo-Getting-Started repository.
The next step is to use the PyAudio library, which enables you to control and manipulate ingoing and outgoing audio from a Python environment.
You can use PyAudio for the microphone and the speaker. For the microphone, in particular, PyAudio is capable of both recording .wav files and streaming audio, making it a versatile and useful tool. PyAudio can be easily configured to generate mono or stereo files with varying bit depths and bit rates.
Typically, audio AI models are designed to receive 16 bit data. However, the Apollo microphones return 24 useful bits of data. To address this, Apollo software includes a relevant operation that converts microphone data to its 16 bit equivalent while streaming. This enables AI audio models to run efficiently in real time. Later on, there are examples of real-time audio processing for streaming applications, such as changing the volume during the stream.
Feel free to record yourself speaking using either the command line (as discussed earlier), or using the PyAudio scripts. If you speak English, save the file as you'll be able to use it later for speech-to-text testing.
Check out the Apollo-Audio repository to get started with recording and playing .wav files with PyAudio, and other applications such as a volume meter and a small audio library to delve into some minor processing tasks.
Getting Started with NLP: NLP Tasks
Natural Language Processing is geared towards allowing machines to interpret and respond to textual data. Natural Language processing combines computational linguistics, statistics, and machine and deep learning together. Common applications include text classification, language translation, and text analytics such as named entity recognition and sentiment analysis.
Named Entity Recognition (NEM) locates words or phrases that are important entities - such as labeling people and places. Sentiment analysis attempts to quantify subjective feelings, like whether a piece of text is positive, negative, or neutral.
NLP processes are rapidly becoming commonplace with various businesses using several tasks such as question answering, text summarization, and speaker diarization to streamline their workflows and gain insight to what people are saying about their products and services, especially on social media.
For effective machine learning, preventing overfitting is imperative, and for this reason a good dataset would be one with about 10x as much data as there are dimensions. Unfortunately language, whether written or spoken, is typically messy: punctuation, excessive whitespaces, repeating words, words with little to no contribution to the meaning of the sentence, and various other factors all serve to make our machine learning tasks more difficult. This makes language-based datasets extracted from pieces of text highly dimensional, and hence more likely to overfit. For this reason, text preprocessing is imperative, and these relatively simple tasks make the difference between good models and excellent models.
Text preprocessing is simply the process of cleaning the text, and only leaving tokens of high value and importance to a task. Capital letters, punctuation, numbers, whitespaces, and certain commonly occurring words (such as ‘the’, ‘a’, and ‘and’) help make a sentence grammatically correct, but are not typically of significant enough value to a machine learning model, and hence they should be removed.
When creating a language-based dataset, the dimensions (columns) of the dataset are typically the words themselves. When plotting a frequency distribution of the words in a text, we would typically note that there are many words which are seldom mentioned, and hence result in very sparse dimensions, most likely leading to overfitting. Not only is it good practice to remove excessively common words, but it is also recommendable to remove words that are mentioned very sparingly.
Another method to combat language sparsity is to eliminate word variations while retaining their root/base forms. An example of this would be reducing the words "running," "runs", and "runner" all to "run". This reduces the number of dimensions while also making the remaining dimension less sparse.
With Apollo, we have included a Apollo-NLP library to get you started with some of these functions as prerequisite techniques to train your own language models, followed by a small demo for your enjoyment.
NLP Use Case: Chatbots
Chatbots are NLP-based software applications that can be used to converse with humans or other chatbots. Chatbots, which are typically used to interact with customers and answer frequently asked questions on websites, are expanding in scope and are expected to rise in popularity. Chatbot complexity varies greatly, with simple bots scanning for key phrases and more complex bots utilizing cutting-edge NLP pipelines.
There are various forms of chatbots, with many designed for business applications and others purely for social conversation. A common type of chatbot is the intent based chatbot. This bot, while conversing with a person, attempts to map what the person is saying to a list of predefined intentions. Common intentions are "greeting", "weather", and "directions". When the intent is determined to be "weather," the chatbot downloads the most recent weather reports before summarizing them using an NLP summarization model and reading the summary out loud using text to speech. Similar tasks are carried out for other intentions.
Training an intent-based chatbot is also relatively straightforward; with only a few example phrases necessary for each intent (more examples never hurt), the underlying model can begin to identify similar sentences by either a bag-of-words model or via text embeddings. This means it can pick up on small variations and reliably and continuously identify the intentions behind user queries.
Other chatbots may not be trained so easily. Social chatbots, for example, typically require extensive data in the form of a query and an appropriate response, and are commonly trained using many movie and television scripts. Chatbots can also be developed using reinforcement learning, but this approach is often not as straightforward as intent style training or even script training, as previously mentioned.
Chatbots can effectively be combined with speech-to-text, text-to-speech, and smart devices to create digital assistants, allowing a user to have effective voice control over various appliances both in their house and in remote locations. Consider asking your custom digital assistant to prepare your favorite coffee by communicating with the bluetooth-controlled coffee machine in the office kitchen, or instructing it to check traffic reports to determine the quickest route to your next destination.
If you are interested in learning more about chatbots, we have put together a small project to get you started. We are developing an Apollo-Chatbot so that we can eventually have our own SmartCow Digital Assistant.
Getting Started with Audio Processing: Audio Recognition
Audio recognition is a growing field that has common applications such as music and speech recognition, animal species identification, and alarm detection, among others.
Identifying an entity or phenomenon by sound computation is an interesting task, which has received much attention in recent years. Previously, rule-based approaches were limited, but with the advent of machine learning and deep learning, significant progress has been made.
Machine learning approaches require developers to compute features, and for audio, these would typically be the short term power spectrum of a sound, the predominant frequencies occurring in the sound, and others of a similar nature.
Deep learning approaches have made frequent use of the spectrogram. A spectrogram is generated from a time domain signal by calculating the Fourier Transform for overlapping chunks of the signal. The resulting fourier transforms are then joined together to effectively form a 3-dimensional plot of frequency (y-axis) against time (x-axis) with amplitude represented as color.
Spectrograms were transformative in the field of audio recognition, effectively converting audio signals to pictures, and hence allowing the use of AI vision techniques such as convolutional neural networks. This provided a basis for speech style transfer using neural style transfer.
For anyone interested in experimenting with audio recognition using spectrograms, there is an Apollo-friendly version of a simple audio recognition program to try out.
Audio Processing Use Case: Speaker Verification
Speaker verification is the process of identifying a person based on the characteristics of their voice. Each person's voice has a unique set of characteristics, and these can be leveraged to distinguish between people. This is a very good use case for problems relating to sound classification.
The primary application of speaker verification is to verify a person's identity. A user is asked to identify themselves and then speak. If the system confirms the user's identity, the user is granted access. A typical system would have two stages: registration/enrollment and login/verification. Because speaker verification cannot verify the identity of someone who is not in its database, a registration process is usually required.
For multi-factor authentication, speaker verification and speech recognition can be combined, and each speaker can have their own password that the system would have to approve, making system entry text-dependent.
With Apollo, we have included an Apollo-Speaker-Verification demo so you can try it out and use it as a template if you want to pursue such a project further!


